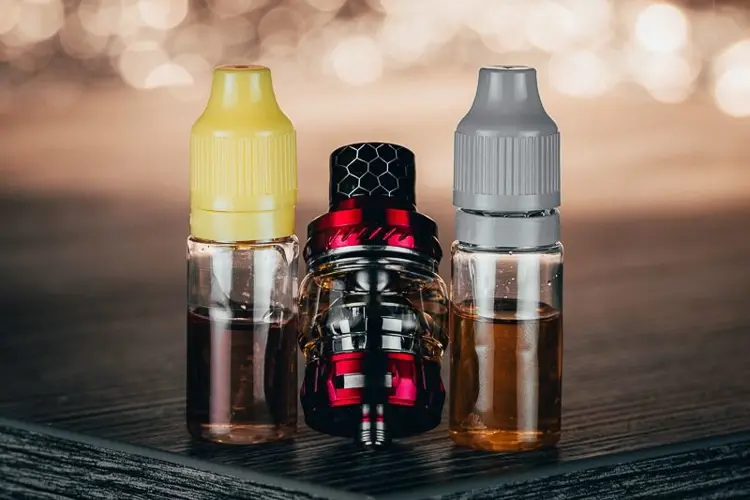
A clean vape is a happy vape
A clean vape is the simplest way to get optimal performance. The ingredients of vape juice will generally not stain your equipment, but residue will accumulate, and the buildup will eventually affect performance. Vegetable glycerin, some darker ejuice flavorings, and especially sweet flavors are notorious for gunking up coils. A gunked up coil will have lower flavor and vapor production and can make your vape taste burnt.
Even if you change the coil head, the flavoring from your last juice might still be lingering in your device. This is especially true for tobacco, coffee, menthol, cinnamon, and other dominant flavors such as melon, grape, or licorice. Imagine trying to vape a grape-flavored coffee e-liquid—no offense to the grape coffee lovers out there.
What if your vape is new? Sometimes, atomizers and tanks will arrive smelling like machine oil. They might not look dirty, but the characteristic smell will give them away. Whether your device is new or well-used, a proper cleaning is a simple way to ensure the best possible experience. Luckily, most tanks these days are easy to clean if you know the right steps to take.
How to clean a vape tank
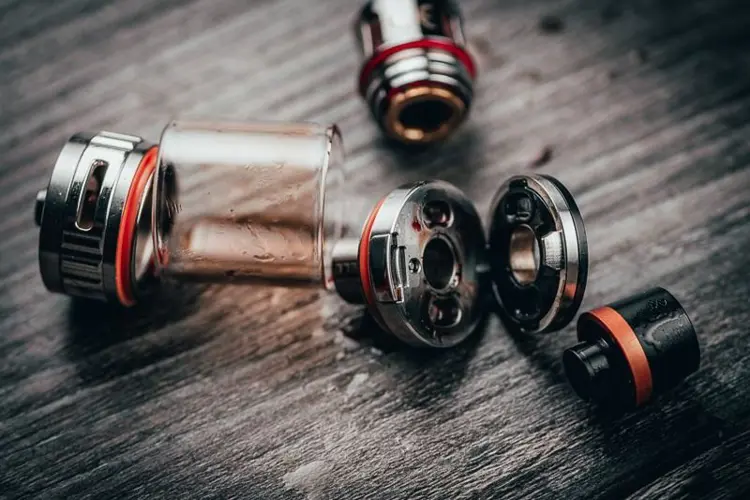
First step: take the coil out (we are going to discuss coil cleaning later). And while you are at it, take the rest of the tank apart. Pay close attention to how things fit together, and make mental note of what goes where. Keep it all organized, and don't lose any pieces. You can use a small bowl to house everything while you do this. This will make cleaning much more efficient, while also familiarizing yourself with the ins and outs of your tank. There are many ways to clean your vape tank, but these are the most effective.
The standard rinse
If your tank is relatively clean, warm water works well. Take the tank apart, separating the parts. Place each part under running water, drying them with a piece of paper towel. Let them air dry afterward until no water or condensation is visible. If your tank hasn’t been cleaned for a while, you might have to add an extra step.
Take your cup or bowl and fill it with water. Place it in the microwave for about two minutes. In the meantime, rinse the parts of your tank under the sink, to get the process started. Next, take out the cup or bowl from the microwave and place your disassembled tank inside of it.
Let it sit until the water cools down, then give your tank one last rinse under the sink. Use a paper towel to gently and carefully dry your tank. Place it aside until completely dry. You can also use a blow dryer to speed up the process, but too much heat can potentially damage your O-rings.
The PG rinse
Instead of water, you can soak your tank in propylene glycol. Simply fill up a bowl or cup with your PG, and let your disassembled tank sit there for an hour or two. Don’t use VG, as that would make cleaning your tank more difficult, since it’s a much thicker liquid.
Once your tank is done soaking in PG, stand it up on a napkin and let it drip dry. This method is excellent for getting out that leftover flavor, as propylene glycol is an excellent flavor carrier.
The cleaning agent rinse
If you want even better results, you can use some simple household items to give your tank a deeper cleaning. Be sure to rinse them thoroughly after application and let your tank sit to get dry.
- Baking soda is a good cleaning agent that can be used to get tanks sparkling again.
- Ethanol, aka grain alcohol, is yet another highly effective substance for cleaning. Don’t get this confused with Isopropyl alcohol which should not be used on the inside of your tank.
- Cheap vodka is not a household item, but chances are you can find it at the grocery store. It will do the job and won’t cost you much.
- Vinegar is a highly acidic cleaning agent but must be thoroughly rinsed to prevent its smell from lingering.
Some vapers prefer using a little bit of dish soap or lemon juice with water instead. Again, remember to rinse well—vaping dish soap is probably even worse than it sounds.
The ultrasonic cleaner
If you want to get the most thorough cleaning possible for your vape tanks, you’ll need an ultrasonic cleaner. Typically used for cleaning jewelry and precious metals, it is now used by vapers worldwide to clean their atomizers. While you don’t need an ultrasonic cleaner made specifically for vape gear, the ones that can run for 10-minute cycles are ideal.
Using an ultrasonic cleaner is not a complicated process. Just fill it with water, put all of the parts of your vape tank inside, and run it until everything is clean. You could add a couple of drops of dishwashing liquid to your ultrasonic cleaner, but it's not necessary. Just give your tank an extra rinse afterward and let it dry.
How to clean your coils
Cleaning coils is a little less straightforward. Replaceable coils come in two types: coil heads for tanks, which are encased in a small metal chamber that contains an absorbent wick, and coils for rebuildables, which require the user to install and wick. The approach to cleaning the two types is vastly different.
Replaceable coils
Replaceable coil heads that come with sub ohm tanks and clearomizers can technically be cleaned, but it won’t completely revive them. Best case scenario, you get an extra few days out of a tired coil head. The reason behind that is the presence of wicks. Letting dirty coils soak and having water pass through them will remove some of the residue, but not all of it. And on top of that, you will need to wait for water to fully evaporate, which may take a while.
If you still want to clean your coil heads, then you can follow the old soak-and-rinse method.
- Let your coil soak in ethanol, vinegar, or cheap vodka for at least a couple of hours
- Place it under the tap and rinse
- Rinse once more with some distilled water
- Blow air on the open side of your coil to force water to the wicking holes
- Set it aside until all water has evaporated
A bit of sun or a heater will speed up the process, but it will still take time. You will notice that the wicks will look much better after that but, again, don’t get your hopes too high. You will still need to change the coil head soon, despite how new it looks.
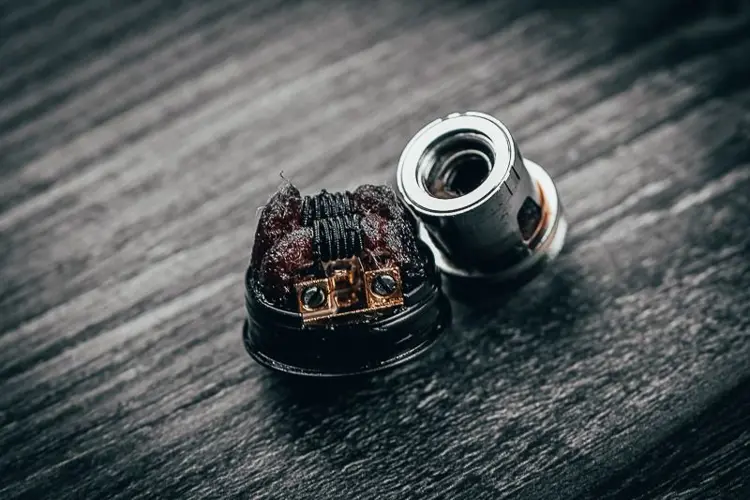
Rebuildable coils
If you are using a rebuildable atomizer, not only can you clean your coils, but you actually should clean them! Gunked-up coils will quickly start suffering in flavor and vapor production. But you can follow some simple steps and have your coils almost as good as new in no time.
The first thing you have to do is remove the wicks from your coils—you don’t want to burn them. If your coils are not that bad, a light dry burn will do the trick. Pulse the fire button a few times until you remove the remaining liquid, let them cool down and re-wick.
But if you have already done this a couple of times, dry burning might not do the trick. In that case, you can follow these steps for deeper cleaning.
- Remove wicks from coils
- Dry burn your coils lightly (don’t let them glow too much)
- Remove the atomizer from your mod
- Place under running water
- Brush them lightly with a toothbrush or a coil cleaning tool
- Rinse once again
- End with a final dry burn to remove the last droplets of water
You can also use a bit of dishwashing liquid when brushing your coils, but take care to rinse them thoroughly afterward in hot water.
If your coils are still gunked up, or if flavor production has dropped significantly, then it’s time to rebuild your atomizer. Proper cleaning will greatly extend the life of your coils, but at some point, they will succumb to time and extensive use.
How to clean your vape pen
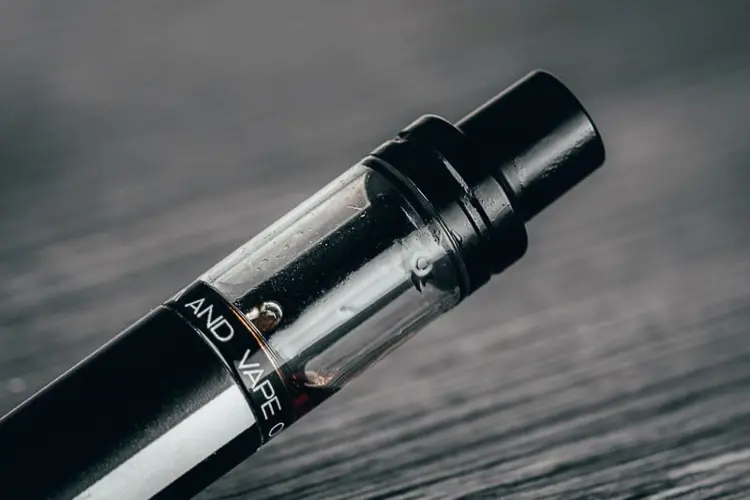
If your vape pen comes with a detachable tank, following the vape tank cleaning tips will do the job. Keeping the battery section clean is also important, but make sure not to use water on it. A soft cloth will work for everyday maintenance, and stains can be removed with the use of a wet towel. Just make sure you don’t get buttons and charging ports wet.
For vape pen starter kits that come in a one-piece design, things get a little trickier. Since water and electronics don’t go well together, even if you try to rinse your device carefully, there are many things that can go wrong. The safest and easiest way to clean an AIO vape pen is by using a Q-tip. Soak a Q-tip in propylene glycol or distilled water and wipe the inside of the tank section thoroughly. For even better results, go over it once more with a dry Q-tip. This way, you will be able to remove most of the gunk effectively.
How to change e-liquid
The first thing to note is that different brands of e-juice are fine to mix. Whether you like the taste of the mix is a different story. For most people, thoroughly cleaning their vapes every time they change e-liquid sounds like a lot of work. Is cleaning your tank between juices necessary? It doesn’t have to be.
If you've vaped your tank empty before changing e-liquid, it shouldn’t take long for the previous flavor to be completely flushed out. In fact, when vaping on similar flavor profiles, some of the in-between puffs might even be very tasty. But if the two juices are very different, chances are you are not going to enjoy the flavor mix. Here’s what you can do to save yourself some time.
Remove all e-liquid from the tank and take some short-duration puffs—this will dry up the wicks. Don’t take more than 3-4 puffs, as a dry hit is lurking. If you are using a regulated device, lowering the wattage will give you some extra safety. With the wicks relatively dry, switching flavors will be much faster—although you might still have some mixed flavor puffs in between.
Another trick to remove the leftover flavor from your wicks is to blow into the mouthpiece of your tank while firing your mod. This will vaporize that last bit of liquid left. It's a useful trick, but you'll want to do it at a very low wattage to be sure you're not going to burn your wicks in the process.
For users of rebuildable dripping atomizers, the process is even simpler. In fact, RDAs are the most efficient atomizers for flavor switching on the go. Just take the top cap off and blow on your coils while firing your device. You will notice that your wicks are drying up and turning white—again, don’t overdo it as you can burn them. Drip some of your new ejuice on your coils and vape on.
For even better results, you can try vaping some base e-liquid between different juices. This works for both tanks and RDAs, and will get rid of lingering flavors more efficiently.


Innokin's co-founder George Xia has left two senior leadership roles. We examine what the company confirmed, and what remains unknown.

Australia’s daily smoking rate fell to 5.6 percent in 2025, while illicit tobacco use among remaining smokers more than doubled.

An Indian consumer group wants a PMO-led task force to confront smuggled cigarettes, counterfeit tobacco, and illegal vaping products.

Shopify has barred vape sales worldwide, forcing lawful retailers outside the United States to remove products or leave the platform.

The Lost Mary VIZ is a 55K-puff disposable with 50 mg nic salt, USB-C charging, 360° LED lighting, visible e-liquid, and a satisfying MTL draw.

Our OXVA NeXLIM 2 and NeXLIM 2 Mini review covers performance, battery life, build quality, and the new UNITECH 3.0 pods. Is it worth the upgrade?

The Cyclone Gust Pro 20K is a nicotine-free disposable vape with adjustable ice levels, turbo mode, and satisfying performance. Read our full review.

The VOOPOO ARGUS G4 and G4 Mini take the series to another level, featuring 3.5 mL multi-ohm pods and 1650 mAh batteries. Read our review to learn more.


