Why build vape coils?
Building your own coils puts you in the driver's seat. Rather than buying disposable coil heads every week, you can make your own. It’s a fun hobby that vapers not only take pride in, but also get to enjoy the fruits of their labor. The way to get good at it is through practice. Although it's perfectly reasonable for first-time builders to get it right on the first try.
This article focuses only on simple coil builds. There's no need to grab your drills and swivels. If you want to learn about more complicated coils, check out our Clapton coil guide.
Supplies to wrap a vape coil
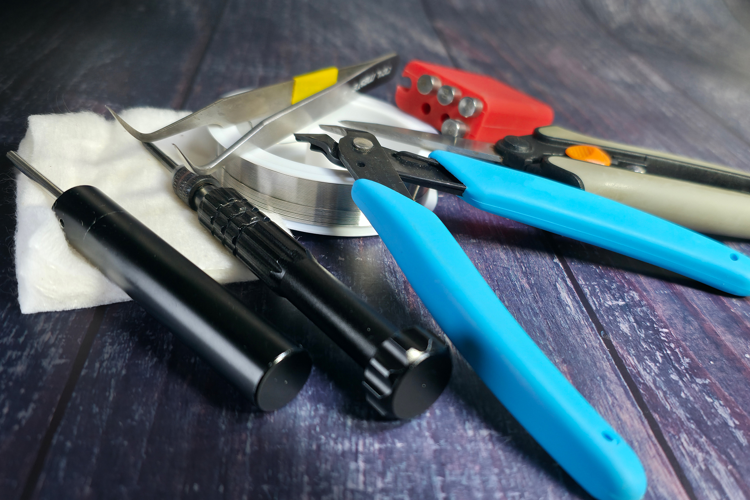
While there are many types of vape tools and accessories you can use to wrap a vape coil, it’s best to keep it simple. There are plenty of good coil building kits on the market that supply you with everything you need, but you can also buy these things a la carte, or maybe you even have these supplies on hand already. Most rebuildable atomizers nowadays come with basic coil building supplies.
- Wire: any of the vaping wires would do.
- Flush cutters: wire cutters that can cut close in small spaces
- Ceramic tweezers: to pinch your coils while pulsing
- Fine tip tweezers: to fluff your cotton and place it inside the wick ports
- Small metal rod: a small screwdriver, or coiling tool
- Organic cotton: or whichever wicking material you prefer
- Scissors: to trim your cotton
Other (optional) accessories:
- An ohm reader: used to be a thing, but a regulated mod gets the job done
- A coil jig: it can make your life a little easier
Micro vs macro coils
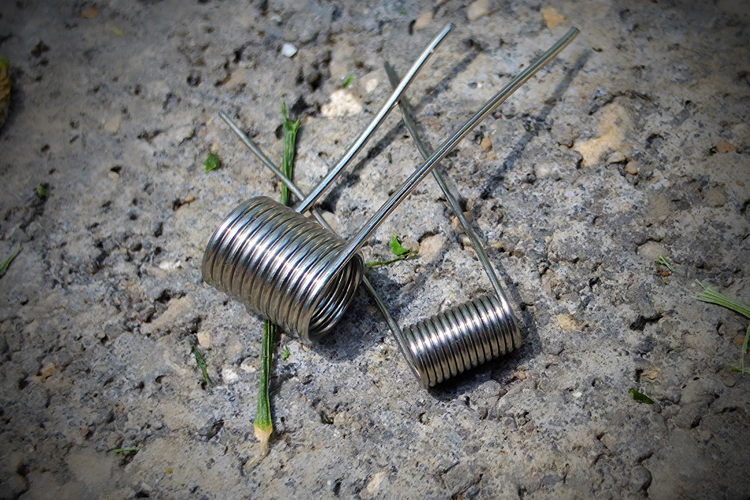
Micro and macro coils are created by taking a single piece of wire and wrapping it around a screwdriver, drill bit, or coil jig. The difference between a micro and a macro coil is the inner diameter of the coil. It’s that simple.
- Micro: a micro coil build is a coil that has an inner diameter of up to 2 mm.
- Macro: a macro coil build is a coil that has an inner diameter of 2.5 mm or above.
The bigger the inner diameter of the vape coil, the higher its resistance, and vice versa. Likewise, the thicker the gauge of wire used, the lower the resistance will be. We recommend using some basic 26-gauge Kanthal for your first few vape coil builds. It will fit fine in most atomizers, and it's very easy to work with.
It is worth noting that most atomizers nowadays can easily fit 3 mm coils and, as a result, you will rarely see people referring to coils as micro/macro.
How to use a coil jig
Coil jigs are tools that help you wrap coils consistently by guiding the wire while it is getting wrapped on a rod. They are very useful tools, and they will help you make perfect coils every time with minimal effort.
Many jigs will come with detachable rods, while others will ship with separate pieces for different wire diameters. Some of the best-known coil jigs are manufactured by Coil Master, UD, and Kuro Concepts.
Single vs dual coils

You might have noticed that the decks of many atomizers are designed for two coils, i.e. they are made for dual-coil builds. Not all atomizers allow for both, and for those that do, you will usually get better performance with one of the two options. Check for the positive and negative posts of the atomizer, as each vape coil will have to go through both. Also, check the airflow of the atomizer. If the air is hitting the posts from both sides, chances are you are looking at a dual-coil atomizer.
When doing a dual coil build, it’s essential for both coils to be identical in size and form, to ensure that they heat up properly. Dual-coil builds obviously create more vapor than a single coil of the same specs, but require double the power to perform.
With two identical coils, the resistance should be exactly one half of each coil's resistance. In other words, if you did a dual-coil build using two 0.6-ohm coils, your build should be 0.3 ohms. If you take out one of those coils, your resistance will go back up to 0.6 ohms.
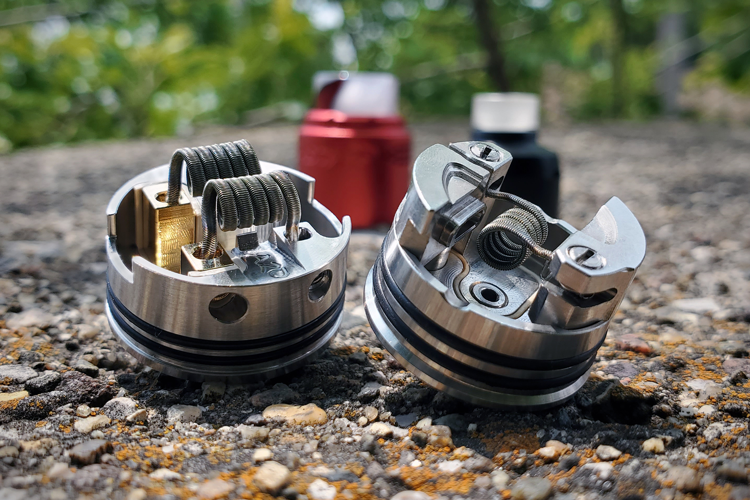
How to build a coil for an RDA
Building for RDAs is usually straightforward, which is why it’s the best platform for new builders. First, examine the deck to see whether it is a dual- or single-coil atomizer. Then check the deck size to see how large a build it can handle. It’s important that the coils don’t touch the top cap or deck, as this can cause a short. Most modern RDAs are compatible with at least 3 mm coils, and many accommodate much larger inner diameters.
Once you’ve established the number and size of your coils, check the position of the posts. Most dual-coil decks require the leads to point in the same direction, while some single-coil decks need them to face in opposing directions. Note that some postless decks may require cutting the leads beforehand. Once your coils are wrapped and ready, place the leads in the post holes and secure them with the screws.
Now that your coils are installed, you’ll need to dry-fire them to ensure they function properly. Attach your RDA to a mod, select a low power setting, and press the firing button in short bursts. Gently strum the coil with ceramic tweezers until it's hotspot-free and glowing from the inside out. If it’s a dual-coil RDA, both coils should glow in sync with each other.
After allowing the coils to cool, it’s time to wick them up. Pinch one end of the cotton into a point, then feed it through the coil. The amount of cotton is crucial. If you use too much, the tension applied will start to bend the coil out of position. If you use too little, it’ll slide easily through the coil without any resistance. The perfect amount of cotton will slip through with some resistance, but not enough to distort the coil. Lastly, clip the ends of the cotton and tuck them into place. Ideally, they should touch the bottom of the deck, plus maybe an extra millimeter or so.
Watch our video to find out how to easily build dual macro coils for an RDA.
How to build a coil for an RTA
If you’ve mastered the RDA-building process, you’ll have no trouble with an RTA. The process is mostly the same, but with two distinctions.
First, the available build space is more limited because the deck is enclosed by a metal chamber. Even if a coil fits in the deck, it might still touch the chamber when reassembled. Choose your coil size carefully and always test for shorts on a regulated mod before wicking.
Secondly, wicking an RTA can be more challenging. It’s also a much more crucial part of the process. Too much cotton can lead to dry hits, and too little may result in flooding. The objective is to completely fill the wicking ports with cotton without packing it tightly or leaving large gaps. The video below demonstrates this in detail.
How to build a coil for an RBA
An RBA section of a sub ohm tank or AIO is typically the most challenging type of build. In most respects, it’s much like building and wicking an RTA, but there are more limitations. The decks and wicking ports are usually tiny and won’t accommodate large coils. Use your coil jig as a reference for the coil size. 2.5 mm inner diameter is usually the sweet spot, but 2.0 and 3.0 mm may be appropriate in some circumstances. Note: don’t always opt for the largest possible coil, as it’s necessary to leave room for air to circulate.
Check out this video of building the UWELL CROWN RBA. You'll notice that building on an RBA can get fiddly, but in many cases, you'll get much better performance than with factory coils.
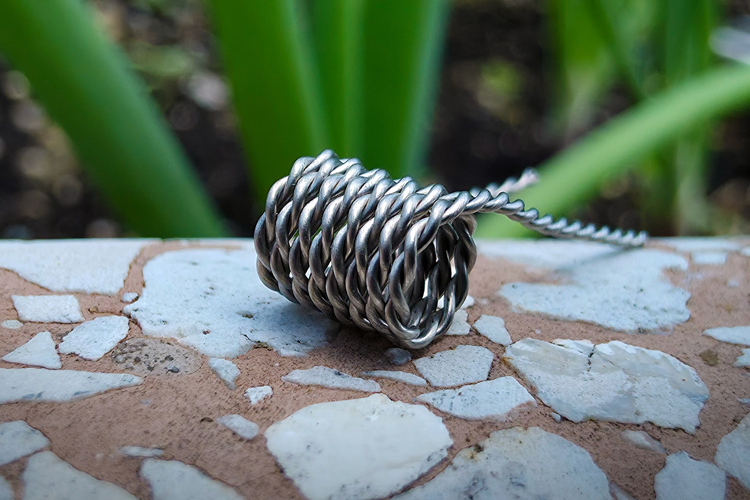
How to build a twisted coil
Once you have mastered single-strand wire builds, you can go to the next level. Twisted coils can be easily made by hand and require no fancy equipment. They will produce better flavor than single wire coils due to the larger surface area, and while your resistance will be lower, it won’t be halved due to the use of more wire per strand.
There are many ways to twist wire, but one of the easiest is the "pen" method. It's super simple: bend a long strand of wire in half, push the two sides together to bring them closer, place a pen at the bend, grab the other two ends with a pair of pliers, and start twisting the pen. What you'll end up with is a handmade twisted coil!
How to build a parallel coil
Another multi-strand type of wire that doesn’t require tools and drills is the parallel coil. In essence, a parallel coil is made out of two or more wires wrapped next to each other. Resistance is divided by the number of wire strands, so make sure you are aware of your device’s limits when building parallel coils. For beginners, a dual parallel 26-gauge Kanthal coil would be a nice starting point.
In the following video, you can see a twisted coil on 0:11 and a parallel coil on 1:33.
Final thoughts
Wrapping vape coils can appear to be much more difficult than it really is. Granted, it can get difficult when getting into complex builds, but the basic vape coils like those on this page are relatively simple to do, with only basic tools and dexterity needed—and maybe a little patience. Don’t give up if you struggle the first couple of times you try it. Rebuilding and wrapping coils offer users cost savings and control over their vape in a way that pre-made coils simply cannot.


Martin Makary has resigned as FDA commissioner following a rocky tenure that included battling with the White House over vape regulation.

The FDA has authorized the sale of four new pods for the Glas G2 device, including the first two legal fruit-flavored vaping products.

The FDA has created a list of e-cigarettes authorized for sale, but the list includes refills, duplicates and non-e-cigarette products.

As of April 1, France has criminalized the sale and possession of nicotine pouches and other tobacco-free oral nicotine products.

The VOOPOO ARGUS G4 and G4 Mini take the series to another level, featuring 3.5 mL multi-ohm pods and 1650 mAh batteries. Read our review to learn more.

The VOOPOO NAVI x Cyph Kit 80K is a refillable pod vape masquerading as a disposable. It includes a 1500 mAh device, an empty pod, and 30 mL of e-liquid.

The Whatabar Linko 40K is a compact, palmable disposable with two power modes and an 18 mL tank. Read our review to find out how it performs.

The ALIBARBAR SWIRL 50K is a 3500 mAh, 18 mL disposable with dual mesh coils, bold flavor, and a smooth, loose MTL draw. See how well it performs.


