Product intro and specs
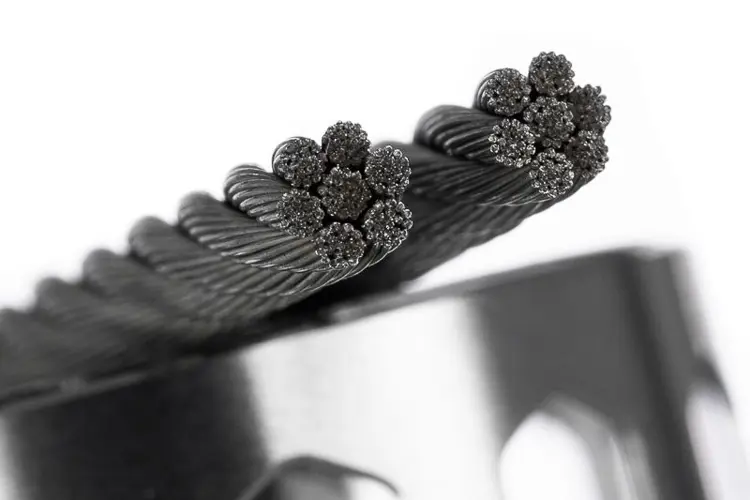
Mr.JustRight1 has once again teamed up with Wotofo to bring us another atomizer in the iconic Profile series. We had the Profile, the Profile Unity, the Profile 1.5, and now we have the Profile RDTA. It’s the first atomizer to come with the new nexMESH Clapton mesh coil.
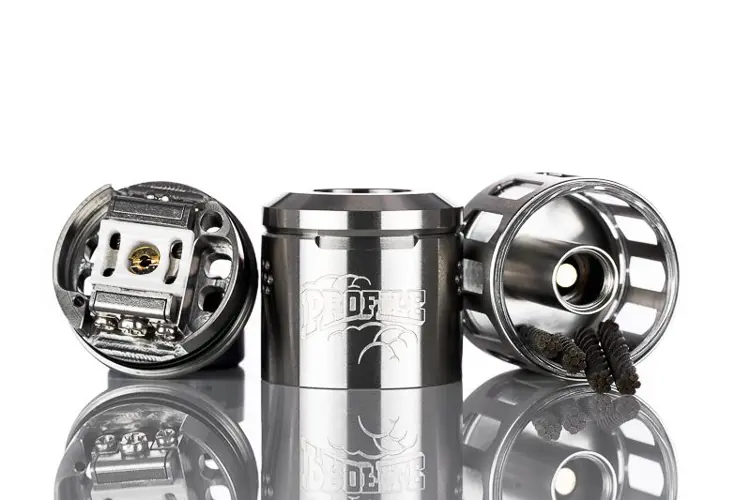
The Profile RDTA is a 25 mm RDTA that can also be used as a regular dripping atomizer or squonking atomizer with the included adapter. At first glance it just looks like the original Profile with a tank underneath, but when you take the top cap off, there’s one noticeable difference right off the bat – there are post holes between the clamps that allow you to do dual coil builds, something you weren’t able to do on previous versions. You can also use the post holes to do a single coil build without having to use the clamps.
So are these improvements enough to set it apart from other RDTAs? Keep reading to find out
This RDTA was sent to me by Wotofo for the purpose of this review.
Price: $39.95 (at Wotofo)
Colors: SS, gunmetal, black, blue, gold, rainbow
Build quality and design
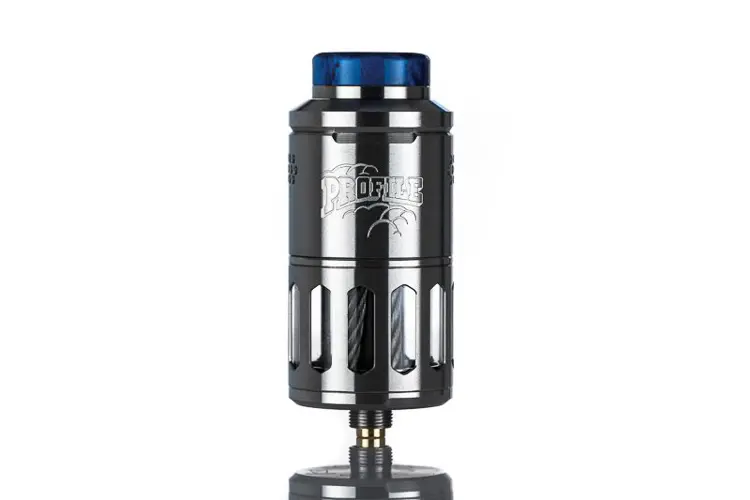
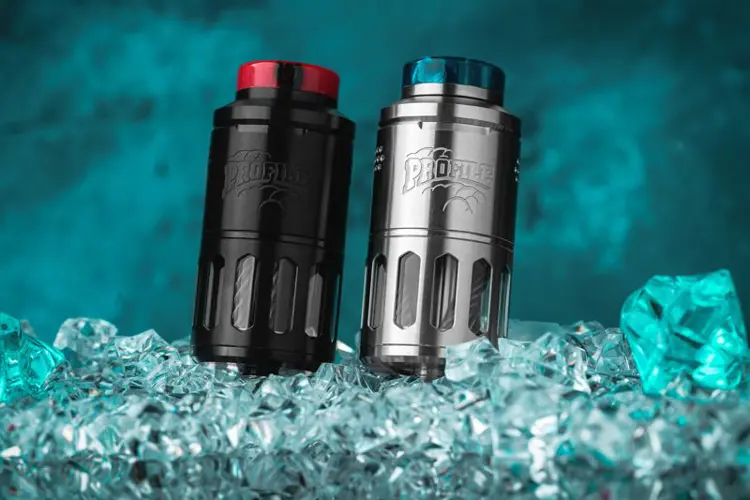
On the outside, the Profile RDTA is similar to the original Profile RDA. It has the same honeycomb style airflow, but they’ve added a metal ring to the drip tip and changed the lettering to more of a block style font. Of course they’ve also added a tank to make it an RDTA, and by doing so they made it kind of tall. It tops out at 45 mm without the drip tip, and 52.7 mm with the drip tip. It’s also 25 mm in diameter as opposed to 24 mm. It has a PCTG tank surrounded by a cage-like frame that I assume is for protection, and it has a 6.2 mL e-liquid capacity.
Removing the top cap, you’ll notice the deck is more similar to the Profile 1.5 than the original because of the way the clamp system is. They’ve gone with the thinner top cap again but don’t expect all that space on the deck, some of that space is being taken up by a fill hole in one corner and a relief hole in the opposite corner. They went back to using two O-rings to secure the top cap to the deck like they did on the original, and the cap fits snug as a bug. All of the O-ring tolerances are perfect except the airflow control on mine was a little tight, even after lubing it up with some liquid.
One new innovation that really sets this RDTA apart from the others is the fact that there are post holes between the clamps for your dual or single coil builds. We’ve seen something similar in the past with the MYUZ Hadar RDA, only when you put a dual coil build in the Hadar RDA, the coils are facing the wrong direction in relation to the juice well. The Profile RDTA corrects this issue. The post holes aren’t very big, but I think that’s due to limited space between the clamps. You won’t be able to use really wide, exotic coils but the fact that you can opt out of using the mesh clamps altogether and use separate post holes for standard coil builds, especially dual coil builds, makes this atomizer incredibly versatile, especially since you can convert it to an RDA or RSA.
The build quality and machining are all top notch, and the finishes are really nice, however I wish the logo wasn’t colored on the gunmetal version. I also like the metal ring on the drip tips but I feel there should have been another drip tip included in the package. All this is subjective though, which leads me to my next point – the steel wicking rods fit loose in the holes. I like when they fit tight, or at least kind of tight, so that way they stand up straight in the tank, but on this tank they lean one way or the other. I tried straightening them up, but they just end up leaning again. It doesn’t affect the way it wicks, it’s just an aesthetics thing but I thought I would mention it. They also rattle when the tank is empty.
Build deck and wicking

The Profile RDTA has a 22.5 mm stainless steel build deck. The mesh clamps are similar to that of the Profile 1.5 and take the same 8.5 mm x 17 mm mesh strips. It even looks like the same ceramic block as the Profile 1.5 with the little grooves, but it has two slits cut out of the ceramic on each end to give you access to the post holes. Both the clamps and the post holes require a Phillips head screwdriver.
The post holes aren’t very large; they appear to be around 2mm in size. They are 7 mm apart from positive to negative, and are 4.5 mm across from each other. That will put your coils pretty close to each other in the center, just right for 3 mm coils in my opinion. Since there’s so much to cover I opted out of trying a single coil at the moment, since one of the main features is that you can now use dual coils.
There is also a fill hole in one corner of the deck that is just over 2.5 mm in diameter, and an air relief hole in the opposite corner that is roughly 1 mm in diameter. I feel like the fill hole could have been a little bit bigger, it doesn’t accommodate 100 mL bottles very well. If you find yourself pouring liquid down the side of your mod, you might want to pour your juice into a smaller bottle.
Building
Because of the different building options I will go over building with the mesh first, then move on to wire coil builds.
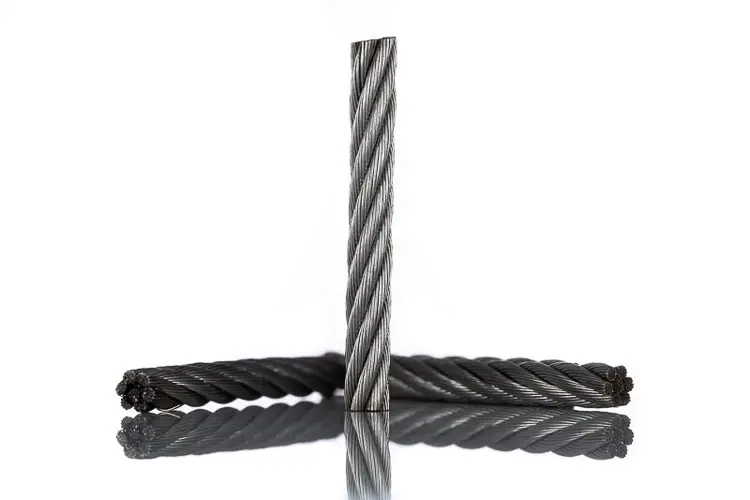
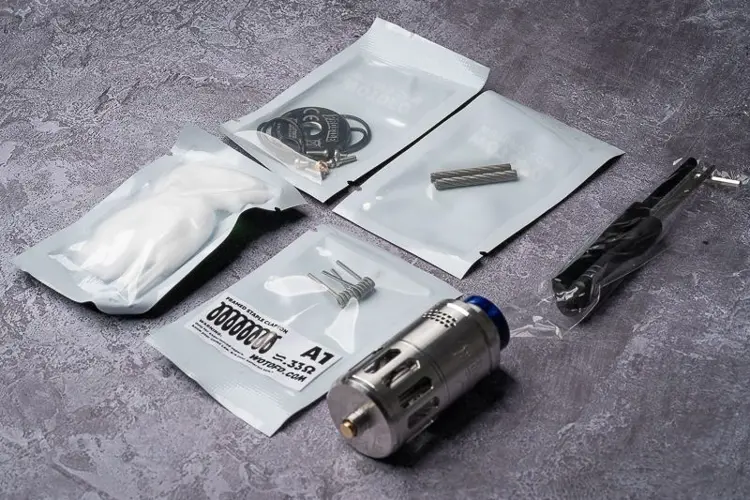
Installing the mesh coil is pretty straight forward, it’s just like you would build any of your other Profile atomizers. There is a coil bending tool that you use to shape your mesh strip before inserting it into the clamps. You might want to be careful with the nexMESH Clapton mesh when bending it, as I’ve already heard stories of the Clapton wires breaking off at the solder joints, since each wire is soldered to a metal strip on both ends and in the middle. I bent mine just as I would any other mesh strip and did not have this happen, but I have to bring it up.
It is recommended you dry fire the Clapton mesh between 5 and 10 watts just to make sure it’s glowing evenly, since it is made up of several, single Clapton wires. Once you’ve done this, you’re ready to wick.
Installing regular wire builds in this deck is also relatively easy. The manual says there is a coil cutting guide and to cut your leads at about 7 mm, but there was no coil cutting guide with mine. So using the biggest size on my Coily tool, which is 8 mm, I tried that first and figured I’d work my way down incrementally. It turns out 8 mm was exactly what I needed because you have to go through the ceramic block before you get to the post holes. The coils are sitting up nicely away from the ceramic, but not so high that they’re touching the top cap. It also allows the coils to be just above the airflow when closing off the top row of holes.
Once you have your coils installed and sitting where you want them, dry fire them and get the hot spots out. Your resistance may be a little higher because of the extra lead length but that’s okay, now you’re now ready to wick.
Wicking
As with the building section of this review, I’d like to start out with wicking the mesh, then move on to wire coil builds.
Wicking the mesh, again, is just like you’d wick any of your other Profile atomizers, but I had a little difficulty with the Clapton mesh. I didn’t know if it was getting hung up on the edges or where the solder joints are and it was pulling the strip a little more than I wanted it to. I ended up pushing down on the ceramic block while simultaneously pulling the cotton through. The Extreme mesh strip is like that too, but not as bad. If you find yourself having the same trouble, just do what I did and it should work for you.
If you’re using the atomizer in RDTA mode, make sure you have your steel rods in place, if not you can still do this before tucking your cotton into the juice well. You want to fluff out your cotton a good bit and cut it at an angle so that it’s longer on the bottom and shorter on the top, then tuck it in so that it’s just sitting on top of the steel rods. You don’t want to cram a bunch of cotton into the juice wells.
For regular wire builds, again, make sure your steel rods are in place before wicking. If not, you can always put them in before tucking in your cotton. After you’ve wicked your coils, you don’t need to cut the cotton very long. You just need enough so that it sits right on top of the steel rods.
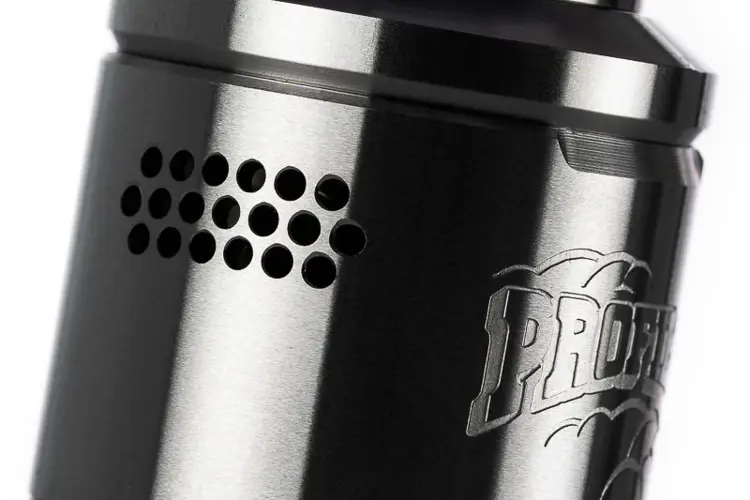
Airflow
The Profile RDTA has honeycomb style airflow like the original Profile RDA and adjusts the same way. As you turn it, the top row will start to close, and once the top row is completely closed the bottom two rows will start to close simultaneously. The one thing they did do differently from the original is that they left the airflow tabs unfinished, so now the silver colored steel helps you see where your airflow is through the holes. It was difficult to see them when they were painted the same color as the finish. They did this on the Profile 1.5 too, but it was definitely needed here.
My airflow control was really stiff even after putting some liquid on it, but that’s not a big deal for me. Once my airflow is set I don’t usually change it unless I put in a different build. On the bright side, at least I know I’m not going to accidentally turn it and change my setting.
Overall, I really like the airflow. It’s smooth and you can have all the wide open air you want, or cut it down to a restricted lung hit. I’m usually a Goon airflow wide open kind of guy, but even with a low ohm, dual-coil build this had too much airflow for me. I closed off the top row of holes and left the bottom two rows open and it was just right for both the mesh builds and dual coil builds.
Performance
When testing the performance of this RDTA, I tried all three mesh strips but I wanted to focus on the nexMESH Clapton mesh and the ability to use dual coil builds, since those are two of the main features of this atomizer. I also used my own Fused Claptons rather than the included Framed Staple Claptons to better compare my vape experience to other atomizers by using a build I’m familiar with. They didn’t indicate the wire size used for the included coils; only the type, diameter, and resistance are labeled on the package.
So with the nexMESH Clapton mesh, you’re supposed to get the best of both worlds between a Clapton wire coil and a mesh strip. They’re a 0.2 ohm resistance and rated at 60 – 80 watts with a recommended setting of 70 – 75 watts. What I experienced was this; it came out to exactly 0.2 ohms, and the best setting for me was 63 watts. I tried turning it up but anything past 70 watts and I felt like I was starting to get dry hits. At 63 watts I was getting a nice, semi-warm vape and I think the flavor may have been a little better than both the Extreme and the Turbo mesh strips.
After vaping through a few tanks of liquid I decided to remove the tank and screw on the adapter so I could use it in squonk mode. It squonks great with both mesh and wire coil builds. I could keep the cotton saturated and take nice, long draws without the fear of a dry hit. I still found that 63 watts was my desired setting for the Clapton mesh. I really don’t feel you need to go higher than that, but that’s just me, your experience may be different.
Let’s move on to dual coil builds, which is another main feature of this atomizer. I think this atomizer works great in dual coil mode. Now granted, the post holes are small so you might not be able to get your hex-core fused Claptons to fit, but your standard dual-core Aliens or tri-core fused Claptons will work fine. With 3 mm diameter coils, they’ll be just the right distance apart from each other after straightening them out, in my opinion. With the coils high enough off the deck to be above the airflow, it’s almost like having a bottom airflow atomizer, and with the coils just below the drip tip, I get really good flavor.
Even though I preferred using the mesh in squonk mode, I still believe RDTAs that use stainless steel rods wick better than those that don’t use them, especially with a tall tank. Every atomizer I have that uses steel rods wicks like a dream. It really brings the juice up to the deck and keeps the cotton saturated. I can see why a lot of companies have been using them lately.
Pros / Cons
Gallery
Verdict
The Profile RDTA is an extremely versatile atomizer that can accept different builds and be converted to an RDA or RSA. Whether the nexMESH Clapton mesh performs any better than the Turbo or the Extreme, I do notice some subtle differences. With the Turbo and the Extreme I was able to turn up the wattage a bit more and get a slightly warmer vape, but with the Clapton mesh I think I may have been getting a little more flavor, but that is subjective and you may get different results. Let me know in the comments how it works for you.
In dual coil mode it works great. The flavor is so good that I haven’t been able to put it down. The fact that there are separate post holes for wire coil builds is a huge plus. Though the steel wicking rods fit loose in the holes and lean to one side, you can’t really see them that well because of the cage-like thing around the tank, so I could be nit-picking a bit there. Just remember that if you’re using 100 mL bottles or bigger, it could get a bit messy because of the fill hole, but I like this atomizer enough that I don’t mind pouring my juice into smaller bottles.
With all that aside, because it is such a versatile atomizer I think it’s a good choice for those who like to use both mesh and wire builds and want something with a tank that has good capacity. How do you feel about the Profile RDTA, or the Profile series in general? Leave a comment below.


Because of declining cigarette sales, state governments in the U.S. and countries around the world are looking to vapor products as a new source of tax revenue.

A list of vaping product flavor bans and online sales bans in the United States, and sales and possession bans in other countries.

A closer look at PouchPoint, an online nicotine pouch store offering competitive pricing, wide selection, and a smooth shopping experience.

A practical, data-driven breakdown of where the vape market is heading—and how to position your business ahead of regulatory and category shifts.

Pastel Cartel ended its lawsuit over FDA refusals to accept more than 100 Esco Bar PMTAs, leaving the dispute unresolved and open to refiling.

Costa Rica has delayed enforcement of sweeping vape flavor, packaging, and marketing rules until Aug. 6, 2027.

UK ministers opened a consultation on plain vape packaging, display restrictions, and flavor-name limits aimed at youth vaping.

Fiserv, BP, Marathon, and Valero warned retailers that unauthorized vape sales could cost fines or card-processing access.


![Image for New Product Releases [January 2026]](https://media.vaping360.com/images/January-2026-Monthly-Roundup-8c47e23b.webp?imageType=Standard&MaxWidth=400&MaxHeight=400)
![Image for New Product Releases [December 2025]](https://media.vaping360.com/images/round-up-december-b615cf31.webp?imageType=Standard&MaxWidth=400&MaxHeight=400)